Mazda 6 Forums banner

Garrett's 2014 Mazda 6 Touring Build Thread: Vee

5.6K views 54 replies 9 participants last post by  mvch6  
#1 ·
I've been on the forum since I've gotten my car and I finally decided it was time to make a build thread.
I have currently 95k (7/23) miles on the car and had it since 24k. The car has been amazing for a bigger family sedan I've kept up with my friends in miatas and much faster cars. This is currently almost "complete" as any build could be... still need a few basic mods wheels, tires new struts maybe coil-overs? But I love it regardless. I've had no issues other than self-inflicted ones (abuse/unskilled mechanic work ie me) in almost 100k miles! Just some rust belt issues. boooo. I love this car and if they ever bring it back that would be my first car purchase. And thank you to the 6Club forums as they have helped me greatly with my ownership of this car!

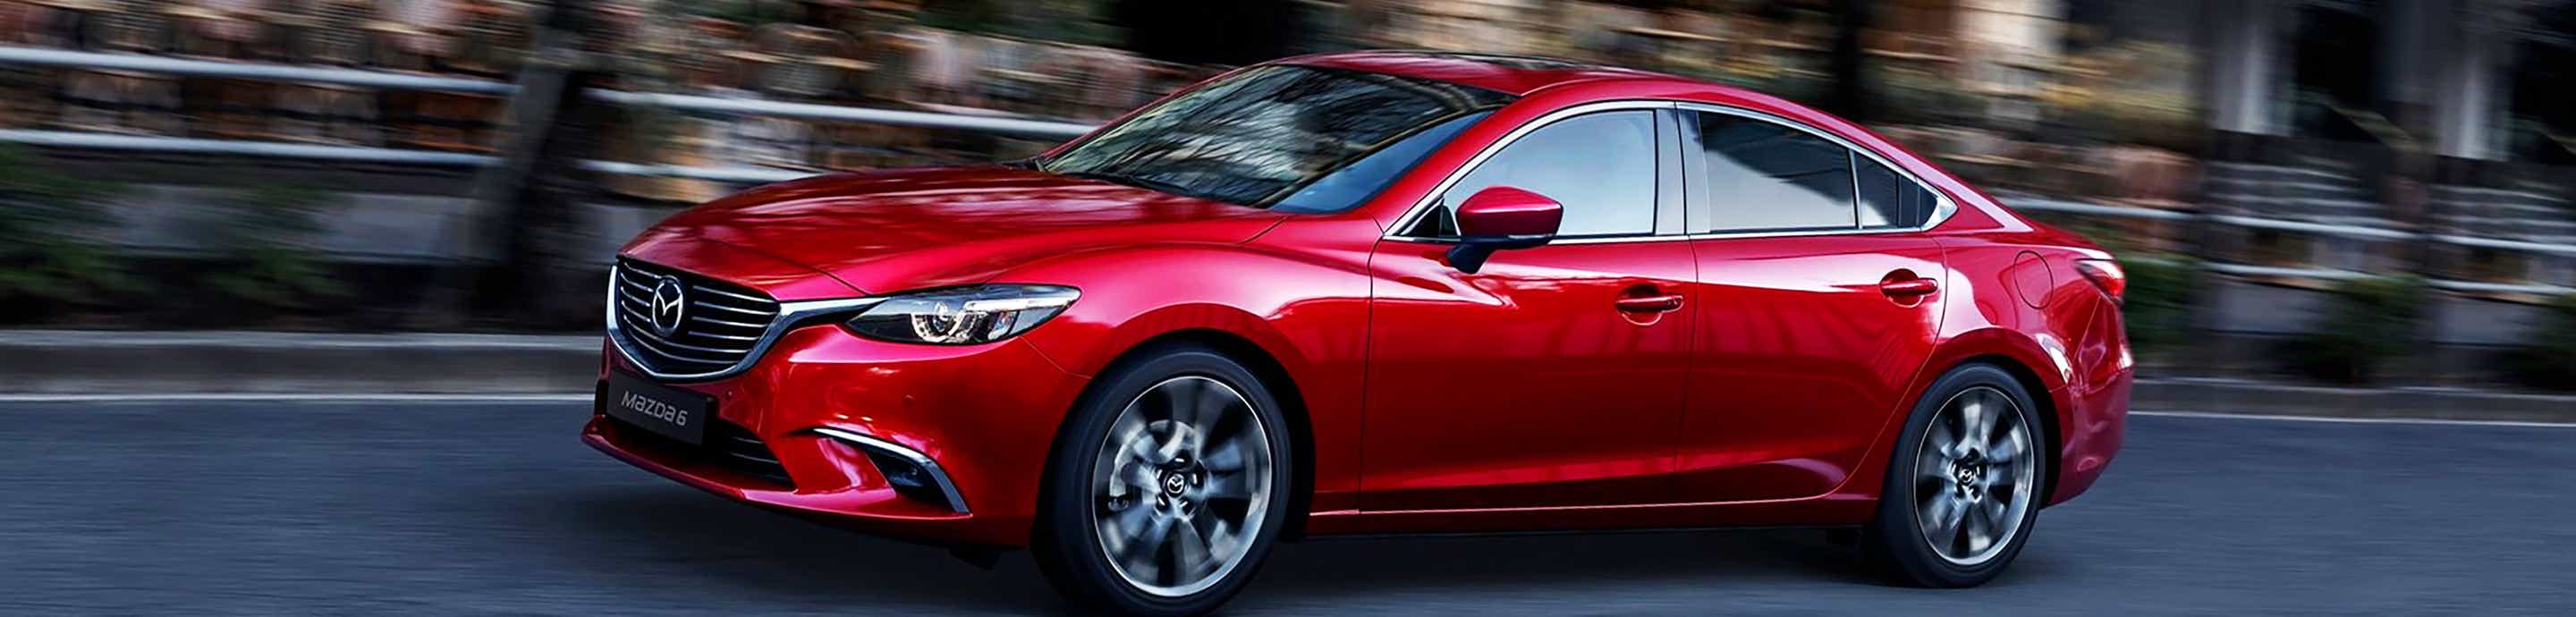
Here is how Vee sits now! The roof rack is off right now because my commute is about 70miles a day 😬


Image


I've recently just supercharged it thanks to knowledge from Daniel and the VT supercharger community!

Engine:
K&N intake with 3" air straightener
VT supercharger with the smaller pulley
Nissan GTR spark plugs
ND2 performance Low-pressure fuel pump
Mishimoto ND Miata oil cooler with 200F thermostat
J&L Oil Catch can for CX5
AWR 70Dura Transmission mount
AWR 70Dura Rear Motor Mount

Image
Image
Image


Exhaust:
2nd cat delete
Vibrant resonator (this actually hurts power with super so will gain 10-15lbft going to factory)
Muffler delete
Vibrant 3in tips
(drones heavily going back to factory res and my racing beat axel back)

Image
Image


Suspension and Brakes:
H&R lowering springs
Progress Mazda 3 Rear sway bar
Stainless lines with RBF 600 fluid
EBC yellow pads
I have a Wilwood BBK just waiting on a rebuild kit and powder coating them yellow

Exterior:
GT 17+ style headlights
Smoked taillights
Roof spoiler 3rd brake light
MV tuning rear diffuser without 4th brake light
Foglight conversion with Morimoto led fogs
Powder-coated matte black OEM 19" wheels
Painted calipers (rattle can yellow)
No front plate (Thanks Ohio!)
Tint [35% full windshield, 15% side windows F/R, 5% rear window]
Yakama roof rack with CargoBox, Ski mounts, and Bike mounts
Image


Interior:
Vivid Racing Forged Carbon steering wheel
Paddle shifter conversion and 2016 GT buttons
Pioneer Headunit with Wireless Carplay and Andriod Auto
Glowshift analog boost gauge
Prosport Oil Temp gauge
idatalink Remote start with OEM fob and Drone Mobile
Image
Image
Image


Lots of plans in the future as well!

Twin charge?:sneaky::sneaky:
 
#2 ·
Exhaust:
2nd cat delete
Vibrant resonator (this actually hurts power with super so will gain 10-15lbft going to factory)
Muffler delete
Vibrant 3in tips
(drones heavily going back to factory res and my racing beat axel back)
Why the hell are you messing with keeping the factory stuff on a boosted motor? Open it up. What part of OH? If youre close you can hear mine and ill build one for you.
 
#3 ·
80mm is mainly for sound on a supercharged motor I will knock the rods out before the exhaust restricts enough air. It also helps the low-end torque. If I do go bigger there would be maybe more high-end power but I'm not too concerned with that. 250-260 is what I should be making and if I get more torque down low that's where I will feel it 99% more often than the 5hp up top. And this has been dyno tested. The super motors like the OEM size exhaust. bigger than 2.5" you lose a lot.

Im in north Columbus.
 
#8 ·
Ok fair enough. I just get a lot on compliments on how it sounds and it sounds like no other system out there. Even before OVT i felt a big difference over stock.
 
#9 ·
Is it completely custom? What all is in it? Drone is really my main concern right now as I take a lot of long drives and at 2-2.5k rpms is miserable

Sent from my Pixel 6 Pro using Tapatalk
 
#10 ·
@TalonTsi90 @Garrett Smith neither of you is quite correct, stock tubing on 2.5L exhaust is actually 2.36"/60mm (that's why welding in 2.25" or 2.5" pieces will require some adapter or extra welding) :)

@Garrett Smith Awesome build, love that you painted the compressor of the supercharger Yellow, what a cool idea, love seeing another Super 6 build 🙌
 
  • Like
Reactions: Garrett Smith
#12 ·
#11 ·
I went right from the stock header straight out the back, in the middle of the bumper, 2.5" mandrel bent sections. It had a decent drone before i finally finished it off a couple weeks ago, cause the tips didnt go past the bumper cover, so the sound got trapped under the car. Now, its actually quieter and a lot less drone. For as wide open it is, its barely louder than stock, cant hear it over traffic from 50' or so, but it flows really good.

Image
 
#19 ·
Ever tracked your car? Wanted to? I mean MO is only a short ways from you and ill be there.

 
#21 ·
Fixed up the exhaust now it is really quiet on the inside but it now butt dynos faster under 3k... interesting for just the stock resonator!

Side-by-side view
Image


Straight pipe
Image


Here are some before Flybys:

RacingBeat and Stock res/midpipe
Image


Here is a flyby with the new exhaust :
you can really hear the Super now!!!
 
  • Like
Reactions: tango
#24 ·
Fixed up the exhaust now it is really quiet on the inside but it now butt dynos faster under 3k... interesting for just the stock resonator!
you can really hear the Super now!!!
That's the first thing I noticed. I wouldn't trade that whine for the spitting and farting of an exhaust. I think you made the right choice.
 
#23 ·
Well, get hooked up with a local SCCA group then, they might have an event at VIR or something.
 
#26 ·
I do autocross pretty frequently, usually twice a month. Track I do not want to do it on my all seasons and stock wheels once I can get a different set I will be tracking.

Hi.What did you do with the brake system?Only EBC yellow pads ?Why not change the caliper, disc and pads?If Brembo is expensive there is an option from cx9 from 2018.2 piston caliper and 320 disc brakes perfectly.
Cost at the moment, But I have picked up a Wilwood kit that will soon be installed. need to see if it will fit under oem wheels if not then hopefully a space will fit.
 
#29 ·
Been messing with the bypass on the supercharger between the OEM one and an aftermarket that I got. I was on the aftermarket one but switched back to OEM chasing a stumble under 1500 rpm. doesn't feel any different just tinkering now

Aftermarket
Image

OEM
Image
 
#30 ·
Been messing with the bypass on the supercharger between the OEM one and an aftermarket that I got. I was on the aftermarket one but switched back to OEM chasing a stumble under 1500 rpm. doesn't feel any different just tinkering now

Aftermarket
View attachment 249343
OEM
Where did you run the second line to with the aftermarket?
I'm still running the aftermarket, been about a month, but left the second port, near the armiture, open to the atmosphere and have been loving it.
Honestly it's a pretty subtle difference, but it does dip into boost a little faster with a little less throttle :devilish:

But those aftermarket bypass valves are cheap and we've seen some QC variability in spring rates from them across the handful of folks in our group chats that have gotten it...
 
#32 ·
#36 ·
Well not the update I was hoping for. I went back to the new bypass and took out for a drive I swapped wheels with a buddy so I was about 1 1/2" lower than usual hit a pothole and broke my oil filter off since my oil cooler plate moved it down below my subframe.

It seems like it will be an oil filter housing and oil filter. These motors don't have the oil filter mounting cast into the motor correct?
Image
Image
Image
Image
Image


Sent from my Pixel 6 Pro using Tapatalk
 
#38 ·
Well not the update I was hoping for. I went back to the new bypass and took out for a drive I swapped wheels with a buddy so I was about 1 1/2" lower than usual hit a pothole and broke my oil filter off since my oil cooler plate moved it down below my subframe.

It seems like it will be an oil filter housing and oil filter. These motors don't have the oil filter mounting cast into the motor correct?
This some shitty luck indeed. I've never had that happen, but I did break a transmission case on my Galant a few years ago. I was travelling down my hill at great speed one night shortly after a major downpour. I turned a corner and saw what I thought was a big leaf from a breadfruit tree in the middle of the already narrow road. I middled the "leaf" and relaxed in my seat, getting ready for the next swooping corner. By the time my headlights illuminated enough of the "leaf" for me to realize that it was actually a rather sizeable rock...no...boulder...it was too late. I hit that thing and I could feel the body of the car lift as it rolled over it. I could hear the stone rolling, breaking, and scraping under the car. Immediately the transmission neutralled up and I had no drive at all. I shut the car down to prevent any internal damage, but it was too late. I had already fried my valve body. The casing was cracked because those Mitsu transmissions carry the pan on the side. It cost me a pretty penny to put right.

Well, good news! it looks like the filter housing can be replaced I just am trying to not remove my passenger axle... as I don't want to get an alignment... will be trying to work on it after work today!
That's great news! Glad to hear it.
 
#37 ·
Well, good news! it looks like the filter housing can be replaced I just am trying to not remove my passenger axle... as I don't want to get an alignment... will be trying to work on it after work today!
Image
 
  • Like
Reactions: tango
#39 ·
#43 ·
I've had some bad experiences with the AWR trans mount. This is the second time I've had it out and probably will stay out.
the upside is I've gotten really good at removing said trans mount....

The trans bracket ate through the 70dura bushing and caused a horrible metal-on-metal vibration accelerating from a stop.

Image


I didn't realize how bad the mount shifted back.....

Image


Completely thrashed after not even 500 miles.....

Image


Moved back to the OEM and holy is it so much better I also put the 62 dura bushing back in the RMM and it feels stock again.

Image
Image


also took this time to reroute my boost gauge ref line and got a bit more slack for when I mount it in the under-center stack cubby.

Image


I know my brake fluid is low one of my calipers was leaking from the Stainless line install got it fixed as well.
 
#45 ·
The trans mount chronicles continues [emoji28]
Awr sent me a new redesign of the mount but I don't know if I want to install it as I've royally fucked it up once already.... And I really did not like the NVH that was gained with the transmount.

To install or to not install that is my question.....
Image
Image


Sent from my Pixel 6 Pro using Tapatalk
 
#46 ·
Another aftermarket mount fail.... AWR RMM with 62 Dura quite literally exploded on me. It lasted the longest though about 15k miles on it but I guess the increased torque from the super was not kind to it.


Image
Image


I ended up going with what @WoodinvilleDan did on his 6. Bought a cheapo generic OEM style RMM and filled it with urethane, so far I love finally got my stock feel back and I cant really tell a difference in stiffness from the AWR mount. Total spent was about 45$ so cost effective too!


Image
Image


Image
 
#47 ·
Holy shit dude. What did you torque that thing down too?! Please don't tell me you torqued to OEM spec...I've seen a few people now torque this mount down wayyyyy past what it's supposed to be, and then have problems with it doing just that.

I just replaced the smaller bushing in mine with 70 duro, but am keeping the black one at 62. The black bushing on mine looks brand new still, and the smaller red one was just a tad spongey.
 
#50 ·
Well, I just checked the RMM install notes on the CorkSport mount and it has about the same torque numbers as you used...so either they updated their instructions since I read them last 1yr+ ago, or my memory is still shit...

Personally I don't go anywhere near those numbers for my RMM, and torque the 2 main bolts down to 55-65ft/lb and the 3 smaller bolts to 45-50ft/lb and just use some blue thread lock on everything to keep it from backing out. The first time I installed any solid aftermarket RMM, I watched the bushings get pinched and start to compress into itself too much so I backed it out and redid it with what made sense to me. I'm sure some people will say I'm doing it wrong, and I'm okay with that.
 
#51 ·
I torqued it to OEM specs 100ish lbft on the 2 big ones. and the 60ish lbft on the 3 smaller ones. Im pretty sure that stiffness is not good for the torque or the 62 dura material is not the greatest quality from AWR..... I love the OEM mount tho from a drivability aspect. Car is no longer a vibrator with AC on at stoplights.
I’m glad I’m not alone in the fact that the AWR RMM made my car shake like a red nose pitbull lbvs. I had one with the softest durometer installed early last year and went the entire spring with it on hoping after 500mi it would subside…soon as I had to use the AC i instantly knew I might take to swap back to OEM. I even got a brand new OEM side passenger mount installed thinking that might be the problem just to realize i wasted my money but I took off the AWR mount shortly after that.

Well, I just checked the RMM install notes on the CorkSport mount and it has about the same torque numbers as you used...so either they updated their instructions since I read them last 1yr+ ago, or my memory is still shit...

Personally I don't go anywhere near those numbers for my RMM, and torque the 2 main bolts down to 55-65ft/lb and the 3 smaller bolts to 45-50ft/lb and just use some blue thread lock on everything to keep it from backing out. The first time I installed any solid aftermarket RMM, I watched the bushings get pinched and start to compress into itself too much so I backed it out and redid it with what made sense to me. I'm sure some people will say I'm doing it wrong, and I'm okay with that.
After reading this, I’m considering maybe giving it another try. I complained to AWR as well by giving them a call and their response was to try a slightly higher durometer bushing which made no sense to me. But I’m sure they had no idea that it was probably torqued way too tight and that was my thinking last year after talking to a few other enthusiasts. However I’m not mechanic so I’d have to find someone that can swap them just so i can test it with lower torque numbers and switch back if i still don’t like it.
 
#52 ·
After reading this, I’m considering maybe giving it another try. I complained to AWR as well by giving them a call and their response was to try a slightly higher durometer bushing which made no sense to me. But I’m sure they had no idea that it was probably torqued way too tight and that was my thinking last year after talking to a few other enthusiasts. However I’m not mechanic so I’d have to find someone that can swap them just so i can test it with lower torque numbers and switch back if i still don’t like it.
If you happen to be near Knoxville TN, I'll teach you how to swap the mounts easily and safely, and would never charge for something like that. A few years ago I had never done anything like it myself, and didn't know anything about working on cars, but hated how expensive it was to take it to a shop. As of last night I finally dropped my rebuilt engine and transmission back into the car myself, and am spending the rest of the weekend putting everything back together after having the front end stripped down to the frame. Learning how to work on my 6 has been one of my biggest hobbies the past 2.5yrs so I'm happy to help however I can.

As much as I love my AWR mounts and have immense gratitude and appreciation for Tony and his family at AWR, i would only suggest swapping the mount back if you are trying to solve a problem by doing so.
 
#53 ·
I would love to swing by if I’m ever in Knoxville! Plus, you really came in clutch with those B6s & I’d LOVE to see all the hard work you put into your car in person.

AWR definitely seemed like a good company and were very accommodating. But I think you’re right and I’ll steer clear of the RMM reinstallation for now. And after the tuning it for 91-93oct with Justin it drives SO much better now. I think a lot of the simple suspension & drivetrain mods we add to our 6s should’ve already had that performance level from factory but that’s just my 2 cents.
 
#54 ·
I forgot to ask if you had those B6s installed yet! If so, how do you like them? It makes me happy knowing I could share the joy I get from my car with someone else by getting them some parts at a price that makes it easier to swallow.

I'm happy to hear the tune has been working out well for you too and the car is running well. That's awesome man! You should try and make it down here this fall for the Mazdas At The Dragon meet we do every year. It'll be a full week this year with much more driving, but typical Thursday-Saturday schedule for those that can only make it for the normal itinerary.