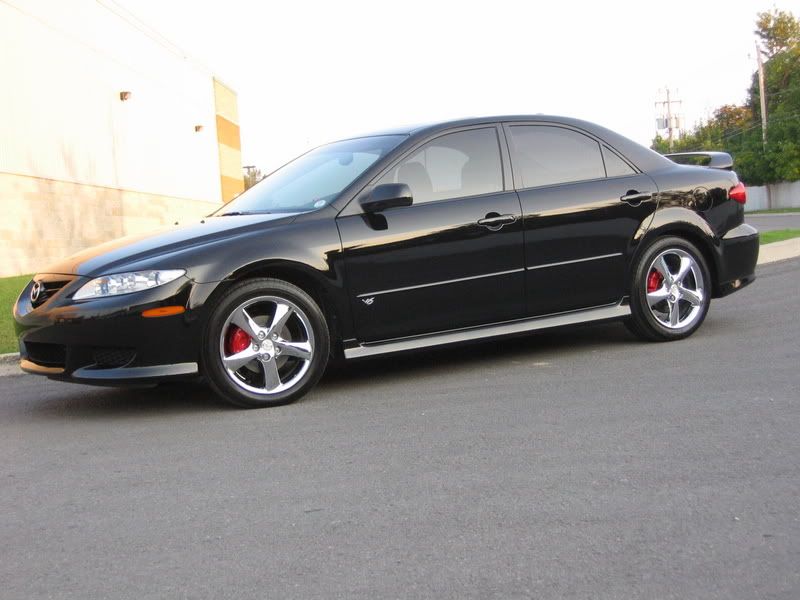

I finally got around to make up my mind on choosing the color for my calipers on my Onyx Black 6 . Was worried red would flash too much , so I was debating for a while between this and , silver or black . Knowing that rust would still show too much on the discs ; doing just the calipers would not be enough . Again silver or black . Came the idea that silver wouldn't match the steel color of the discs (where pads contact) , too with my silver OEM mags and that rust tears would show too much on silver .
So I went with satin black for the discs , and for the same reasons above ; silver wouldn't do for the calipers .... so I decided that red would come out nicely with the chrome-dipped mags & the onyx black body combo of color . Not having a garage to shelter me from wind-swept paint fumes , I chose to go with paintbrush caliper paint kit from Duplicolor , and I figured that way I'd have less of a chance to mess up the job with over-sprayed paints runs .
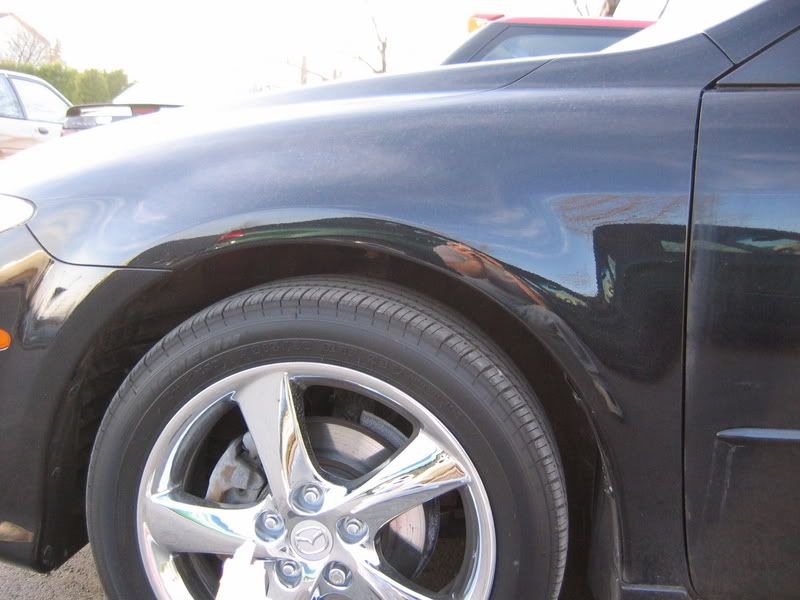
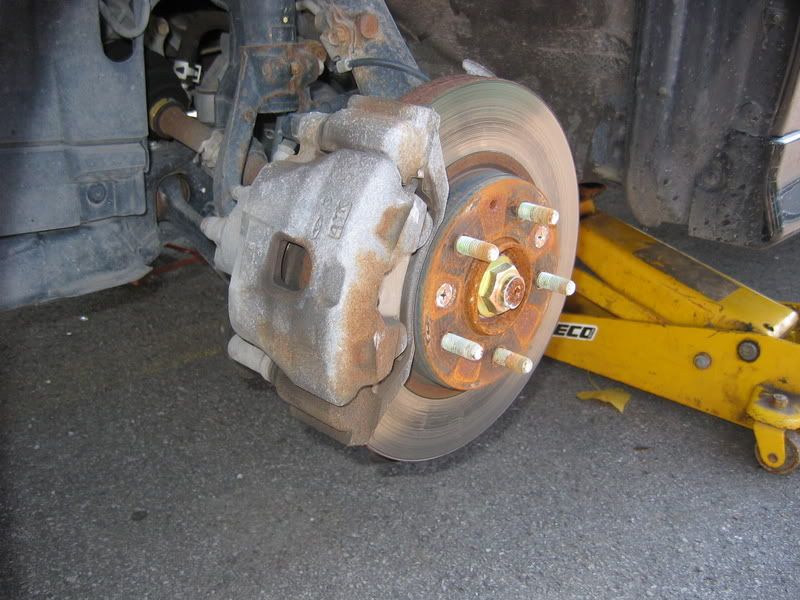
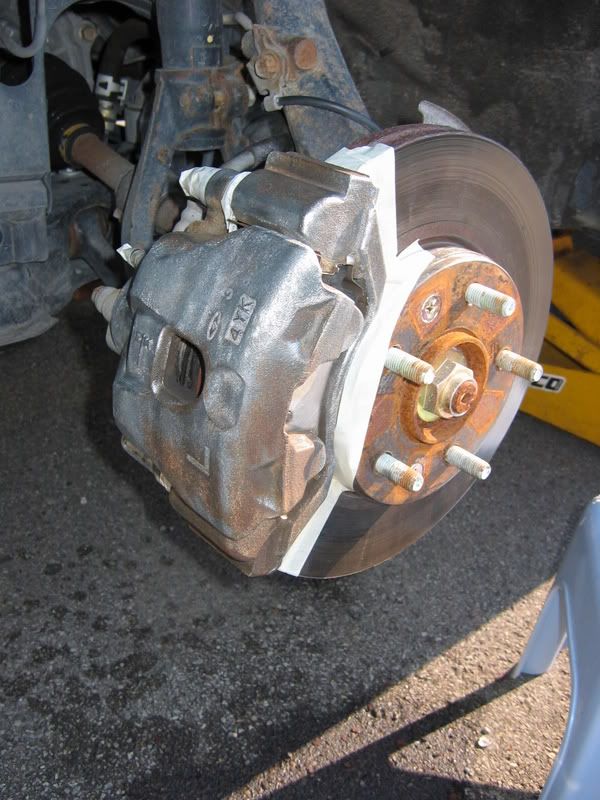
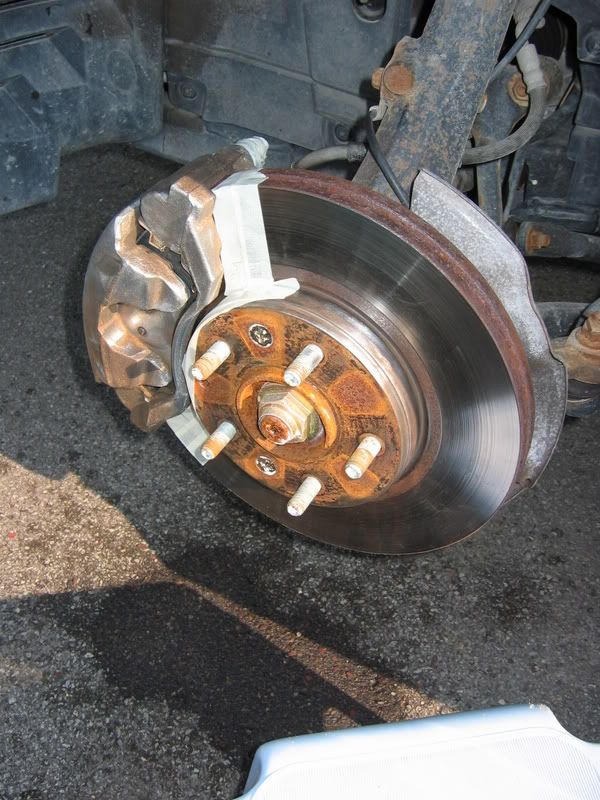
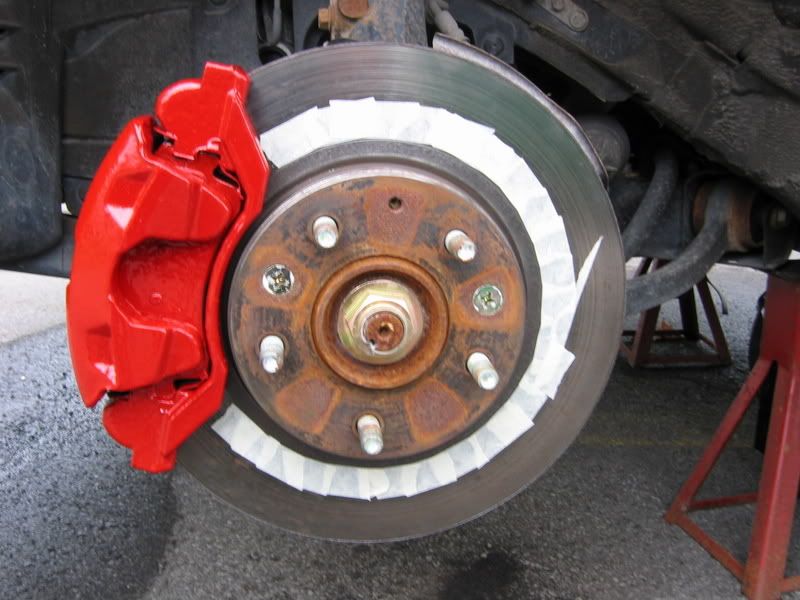
This is what I (and certain ones who've seen pics of my 6 here before) had to contend with when looking at her in her previously sad state .
![Image]()
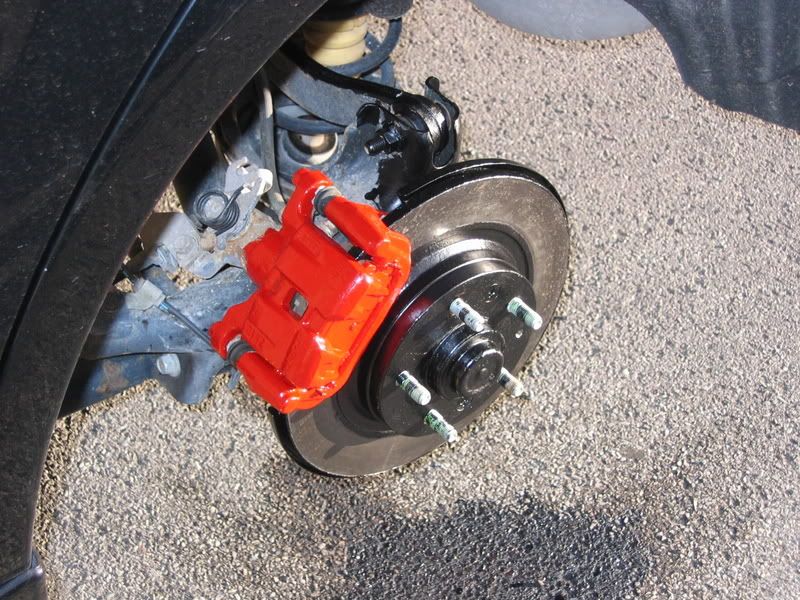
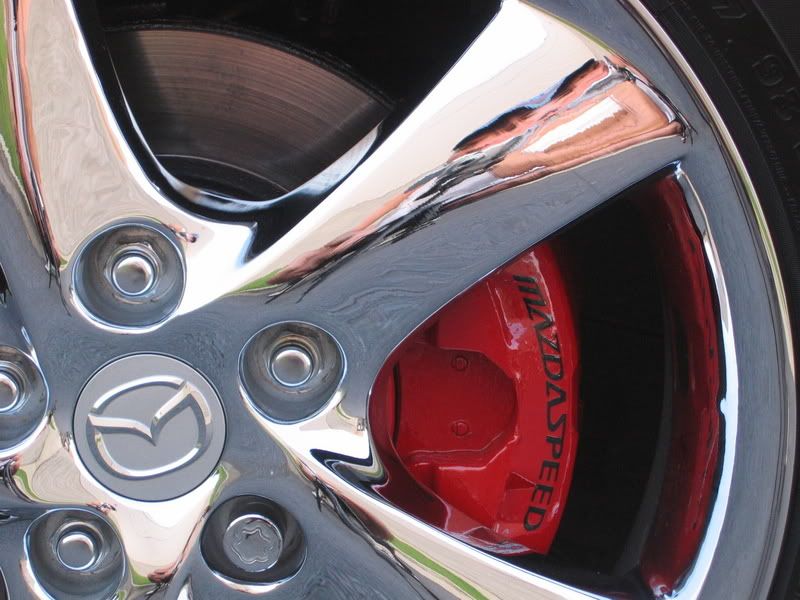
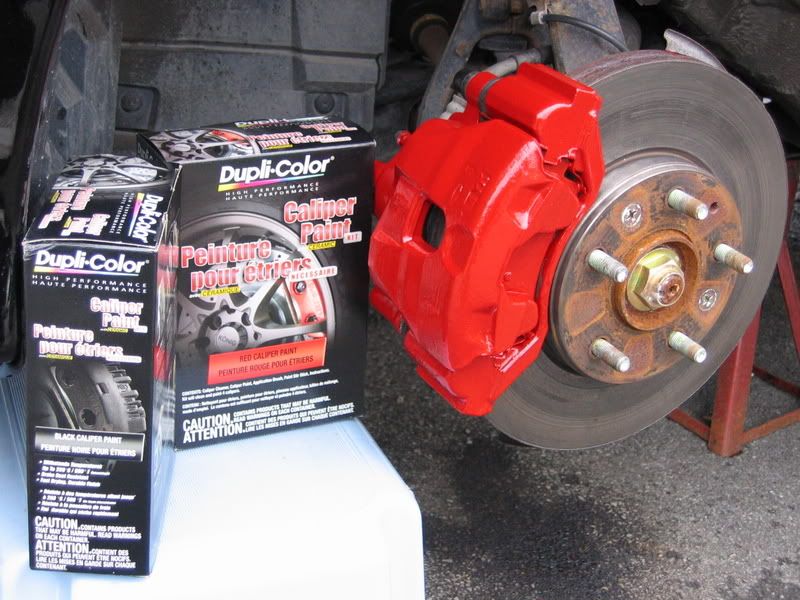
and voila ! ... never to be looked at the same ; now I can't keep my eyes off of her :yesnod: (more pics for desert , below the How-To)
![Image]()
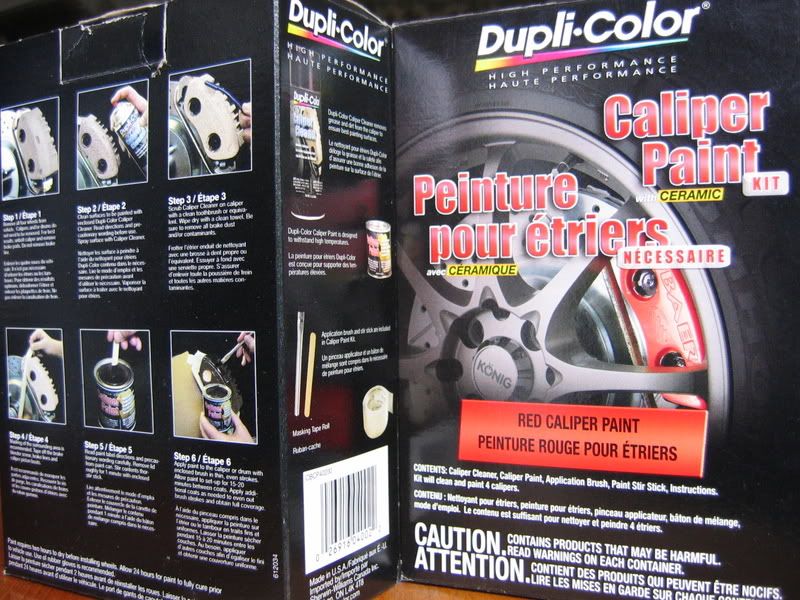
STUFF NEEDED :
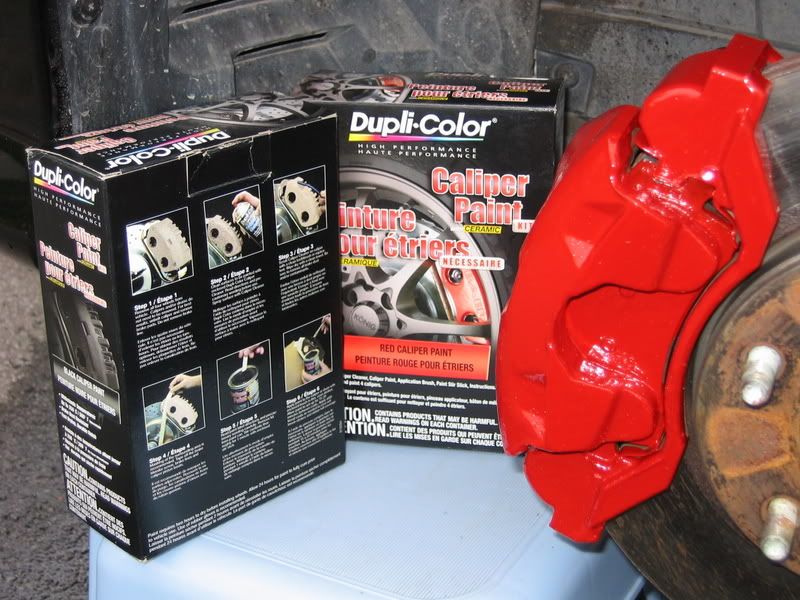
The beauty with the DupliColor CERAMIC Caliper Paint Kit is that everything you'll need is included in it for $22 CDN . It comes with one pint of paint (which you will have more than half left after doing two good coats) , one paint brush , one popsicle stick (for mixing) , one spray can of Brake Cleaner , one roll masking tape enough to complete the job the job (didn't have to use the extra roll I'd bought in case) .
![Image]()
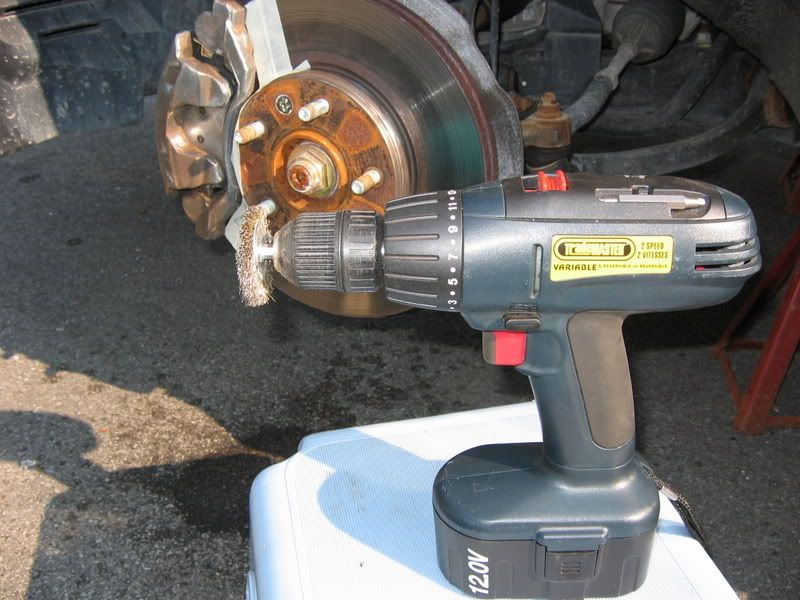
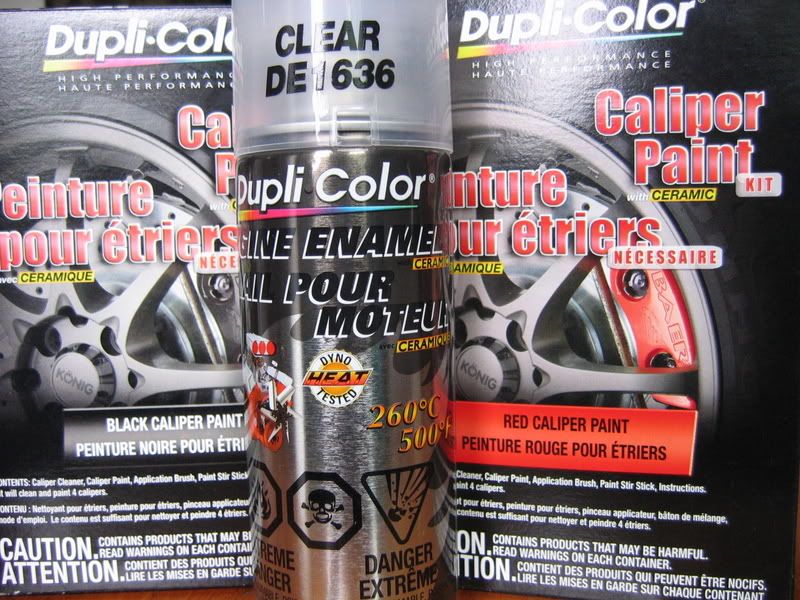
The only other things I bought was a 3m Scuff Pad and two (1 1/2 & 2 1/2in.) circular copper-coated wire bristle brush to mount on my drill for scrubbing away loose rust on the discs and oxidization on the calipers . Hey , I wasn't gonna waist energy on sanding and see-saw motion with a hand wire-brush !") And last , a spray can of Clear - DupliColor Engine Enamel with High Heat CERAMIC .
And last , a spray can of Clear - DupliColor Engine Enamel with High Heat CERAMIC .
3M Scuff Pad
![Image]()
Circular Wire-Bristle Brush
![Image]()
Clear Spray Can
![Image]()
HOW-TO:
IMPORTANT
Now make sure you raise the car on four safe jack stands .... and remove all four wheels ; 'cause you will be doing every step consecutively to all four corners before proceeding to the next step : this way no time is wasted and steps uselessly done .
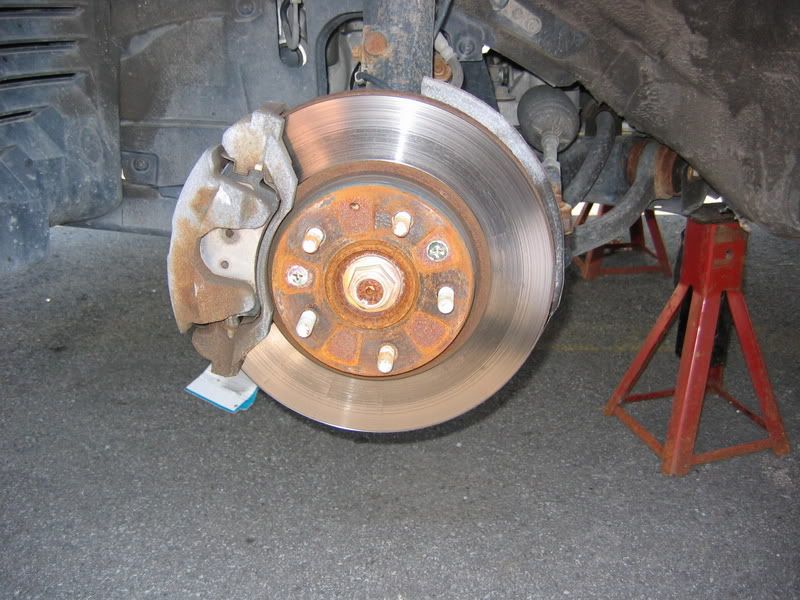
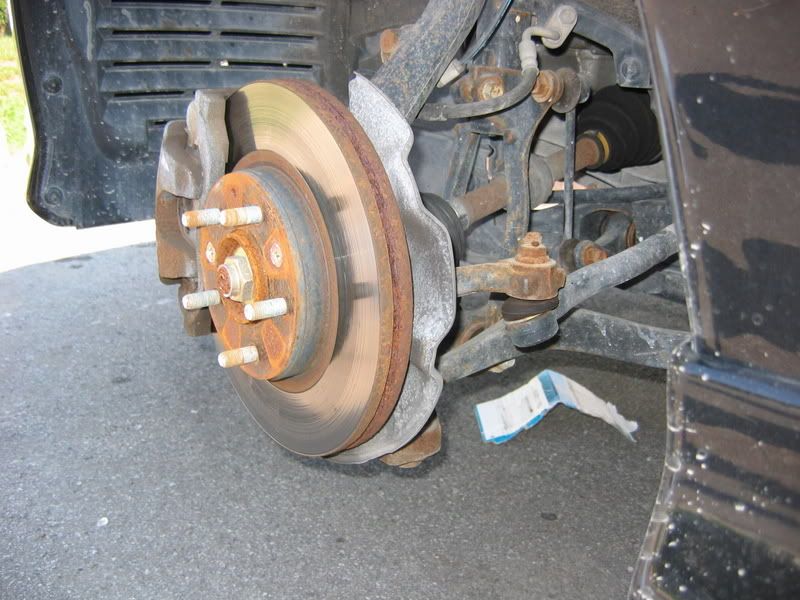
A year and a half of rust and oxidization
![Image]()
![Image]()
![Image]()
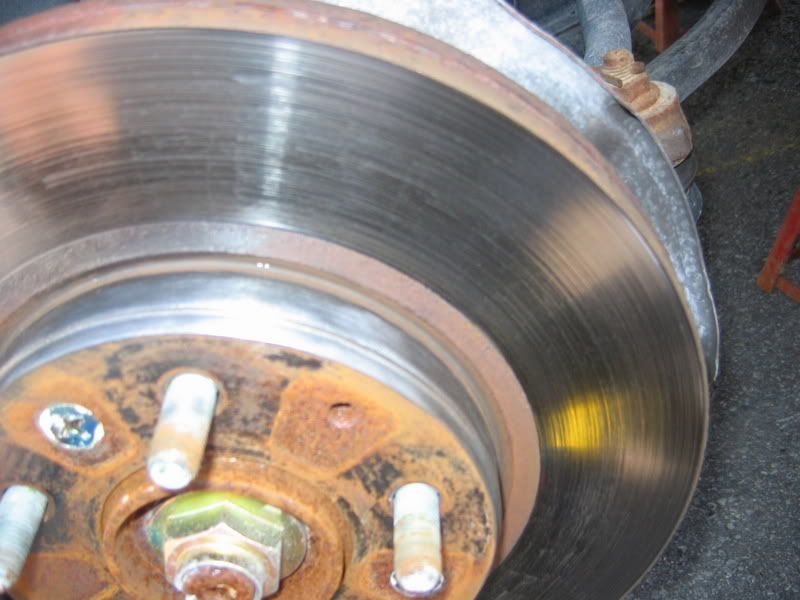
After a quick-pass of the drill just to show (middle-area of disc) the difference (left/right) on a portioned-done part of the disc
![Image]()
I continued to drill-scrub all around the middle part edge + the outer circumference edge of the disc (part around - where it is ventilated) ..... which were all going to be blacked 'later' . Finished scrubbing-off with the easiest part : the caliper itself .
Once you're done scrubbing , wipe excess dust left-overs with rag . Then proceed to spray the BRAKE CLEANER (can supplied in kit) over all areas to be painted (including dust shield in back of disc - even though I didn't scrub it) . Use abundently (I had two kits ) This cleaner dries instantly ! No need to wait/worry for drying .
Then proceed to mask areas around caliper with tape . (In my case I chose to paint the calipers first ) also in the pic below with rust untouched ( I had no intentions of painting the center/unseen part where studs are since the mag was going to hide it ... but later changed my mind and painted it over rust = more pleasing pics for How-To)
![Image]()
![Image]()
Follow instructions and proceed to paintBRUSH one light coat and allow to dry at least 15 minutes (meanwhile go on to the next 3 calipers) . Make sure to apply even amounts with the brush to even out the coating . By the time you're done the first coat on all four calipers ; it'll be time for the second coat starting with the 1st caliper. With this next coat it really covers well and you won't need a third .
Remove tape and voila ! (the paint dries and can be handled after 3 hours)
![Image]()
![Image]()
By this time I had run out of daylight , but no way was I to leave a beautiful caliper next to a terrible looking disc ..... so I ended doing the black on the discs the next day ......
Now , in this next pic ; I taped the area where the pad makes contact , but allowed a slight gap (@ a mm) to make sure middle circle area would be entirely covered with painted (do tape only portion where caliper permits - not entire circle 'cause tape won't clear under pad and won't allow you to rotate it )
![Image]()
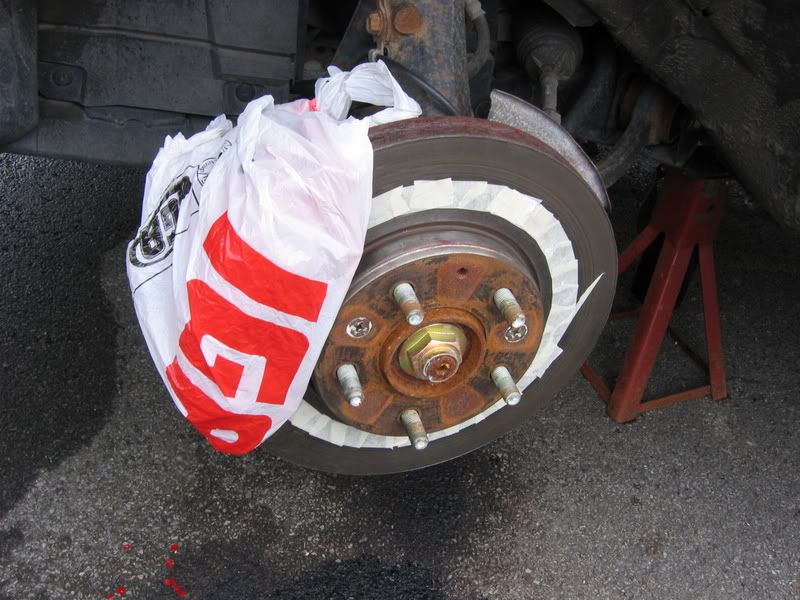
Take a grocery plastic bag and slide it under the brake pad and then over-lap the caliper with it and tuck it in tight in the back ; so to avoid black paint over your hard worked red painted caliper !
![Image]()
Again , do this to all other wheels before you start painting .... once covered go ahead and paintBRUSH .
Once the fourth caliper painted , DO NOT REMOVE THE MASKED AREAS ! CONTINUE applying a second coat to all four again ; in same manner .
Once the two coats of black applied remove masked areas , rotate the disc to reveal unpainted area from under caliper and proceed to tape/mask in previous fashion ..... then when done the same to all four ..... proceed to apply first coat to one after caliper after the other , then proceed with a second coat .
![Image]()
Once all masked areas removed , I didn't like what I saw : the middle area left unpainted , so for How-To picture/appearance purposes I went ahead and painted over the un-removed rust ..... and then I continue my paint-binge with the vertical suspension bar that to me WOULD BE visible once the wheels would be back on .... again I went ahead and painted over these un-prepped as well !
![Image]()
![Image]()
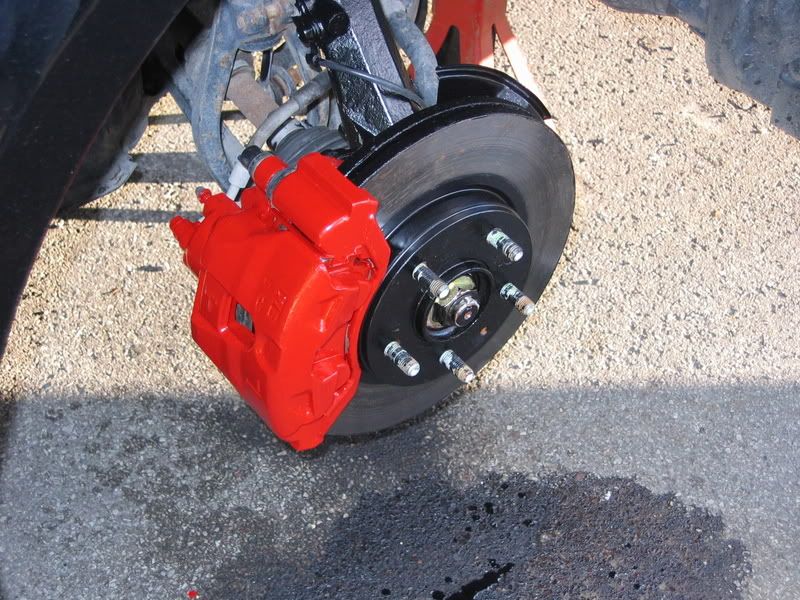
I like the clean finish and contrast it gives where the pad contacts next to the black painted disc part (over/under)
![Image]()
![Image]()
Went ahead and painted the suspension parts to the rear as well
![Image]()
So I went with satin black for the discs , and for the same reasons above ; silver wouldn't do for the calipers .... so I decided that red would come out nicely with the chrome-dipped mags & the onyx black body combo of color . Not having a garage to shelter me from wind-swept paint fumes , I chose to go with paintbrush caliper paint kit from Duplicolor , and I figured that way I'd have less of a chance to mess up the job with over-sprayed paints runs .
This is what I (and certain ones who've seen pics of my 6 here before) had to contend with when looking at her in her previously sad state .
and voila ! ... never to be looked at the same ; now I can't keep my eyes off of her :yesnod: (more pics for desert , below the How-To)
STUFF NEEDED :
The beauty with the DupliColor CERAMIC Caliper Paint Kit is that everything you'll need is included in it for $22 CDN . It comes with one pint of paint (which you will have more than half left after doing two good coats) , one paint brush , one popsicle stick (for mixing) , one spray can of Brake Cleaner , one roll masking tape enough to complete the job the job (didn't have to use the extra roll I'd bought in case) .
The only other things I bought was a 3m Scuff Pad and two (1 1/2 & 2 1/2in.) circular copper-coated wire bristle brush to mount on my drill for scrubbing away loose rust on the discs and oxidization on the calipers . Hey , I wasn't gonna waist energy on sanding and see-saw motion with a hand wire-brush !
And last , a spray can of Clear - DupliColor Engine Enamel with High Heat CERAMIC .3M Scuff Pad

Circular Wire-Bristle Brush
Clear Spray Can
HOW-TO:
IMPORTANT
Now make sure you raise the car on four safe jack stands .... and remove all four wheels ; 'cause you will be doing every step consecutively to all four corners before proceeding to the next step : this way no time is wasted and steps uselessly done .
A year and a half of rust and oxidization
After a quick-pass of the drill just to show (middle-area of disc) the difference (left/right) on a portioned-done part of the disc
I continued to drill-scrub all around the middle part edge + the outer circumference edge of the disc (part around - where it is ventilated) ..... which were all going to be blacked 'later' . Finished scrubbing-off with the easiest part : the caliper itself .
Once you're done scrubbing , wipe excess dust left-overs with rag . Then proceed to spray the BRAKE CLEANER (can supplied in kit) over all areas to be painted (including dust shield in back of disc - even though I didn't scrub it) . Use abundently (I had two kits
) This cleaner dries instantly ! No need to wait/worry for drying . Then proceed to mask areas around caliper with tape . (In my case I chose to paint the calipers first ) also in the pic below with rust untouched ( I had no intentions of painting the center/unseen part where studs are since the mag was going to hide it ... but later changed my mind and painted it over rust = more pleasing pics for How-To)
Follow instructions and proceed to paintBRUSH one light coat and allow to dry at least 15 minutes (meanwhile go on to the next 3 calipers) . Make sure to apply even amounts with the brush to even out the coating . By the time you're done the first coat on all four calipers ; it'll be time for the second coat starting with the 1st caliper. With this next coat it really covers well and you won't need a third .
Remove tape and voila ! (the paint dries and can be handled after 3 hours)
By this time I had run out of daylight , but no way was I to leave a beautiful caliper next to a terrible looking disc ..... so I ended doing the black on the discs the next day ......
Now , in this next pic ; I taped the area where the pad makes contact , but allowed a slight gap (@ a mm) to make sure middle circle area would be entirely covered with painted (do tape only portion where caliper permits - not entire circle 'cause tape won't clear under pad and won't allow you to rotate it )
Take a grocery plastic bag and slide it under the brake pad and then over-lap the caliper with it and tuck it in tight in the back ; so to avoid black paint over your hard worked red painted caliper !
Again , do this to all other wheels before you start painting .... once covered go ahead and paintBRUSH .
Once the fourth caliper painted , DO NOT REMOVE THE MASKED AREAS ! CONTINUE applying a second coat to all four again ; in same manner .
Once the two coats of black applied remove masked areas , rotate the disc to reveal unpainted area from under caliper and proceed to tape/mask in previous fashion ..... then when done the same to all four ..... proceed to apply first coat to one after caliper after the other , then proceed with a second coat .
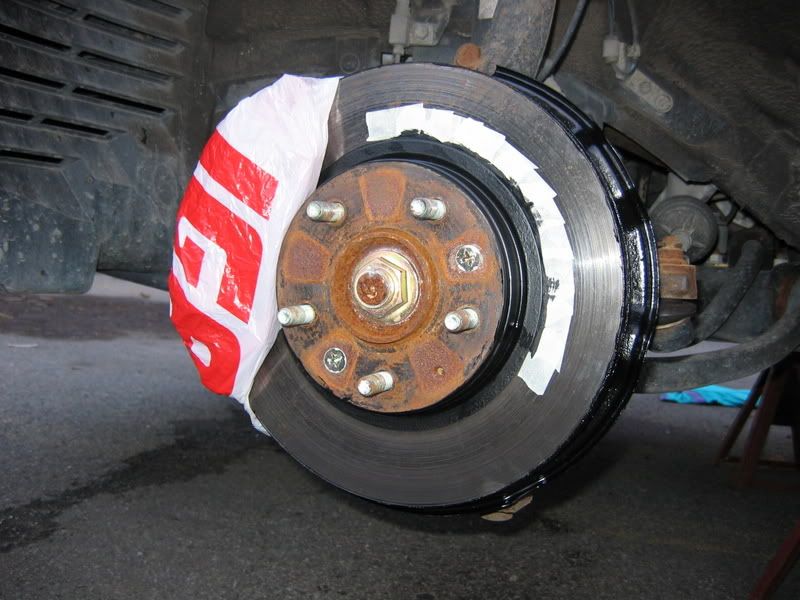
Once all masked areas removed , I didn't like what I saw : the middle area left unpainted , so for How-To picture/appearance purposes I went ahead and painted over the un-removed rust ..... and then I continue my paint-binge with the vertical suspension bar that to me WOULD BE visible once the wheels would be back on .... again I went ahead and painted over these un-prepped as well !


I like the clean finish and contrast it gives where the pad contacts next to the black painted disc part (over/under)

Went ahead and painted the suspension parts to the rear as well